
macOS Setup — L2TP VPN on Mac
Set up L2TP VPN through macOS built-in Network Preferences — no third-party apps required.


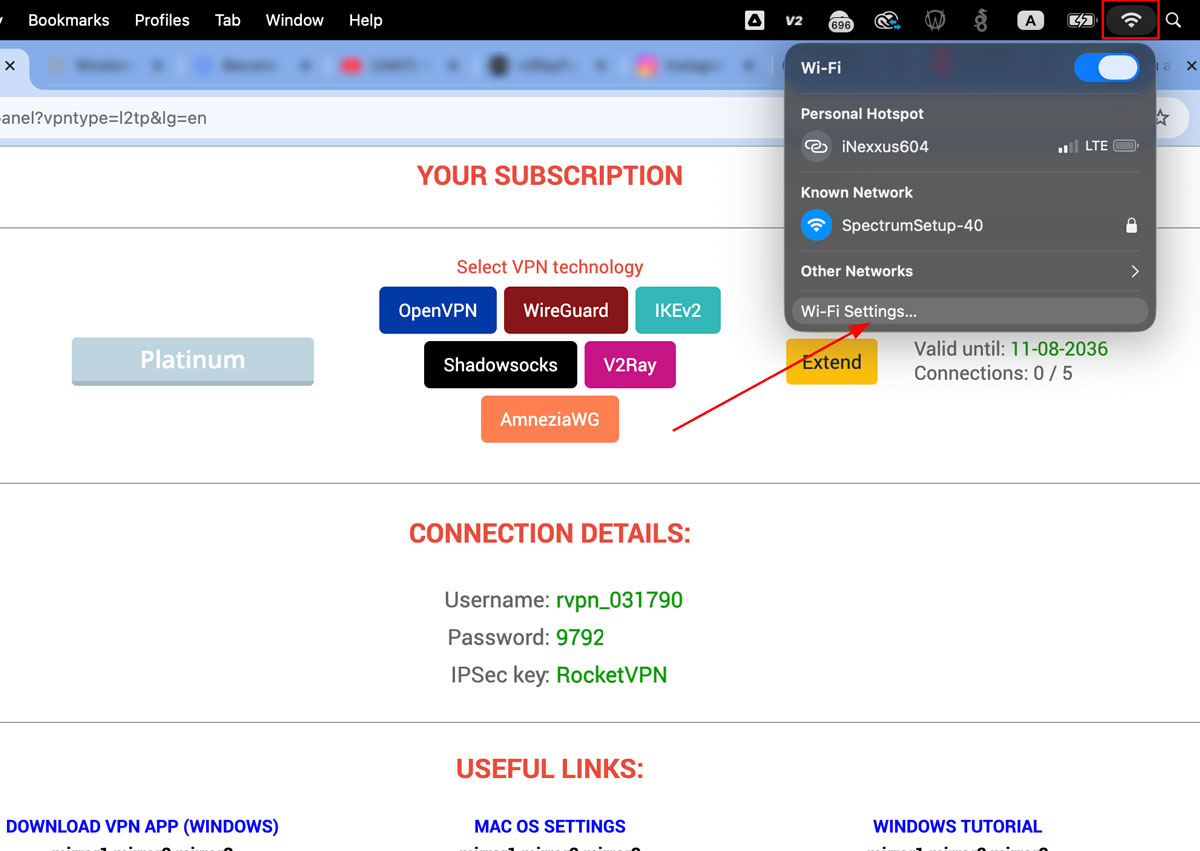
1. Network settings
Click the Wi-Fi icon in the top menu bar and choose Network Preferences… — the network interface panel will open.
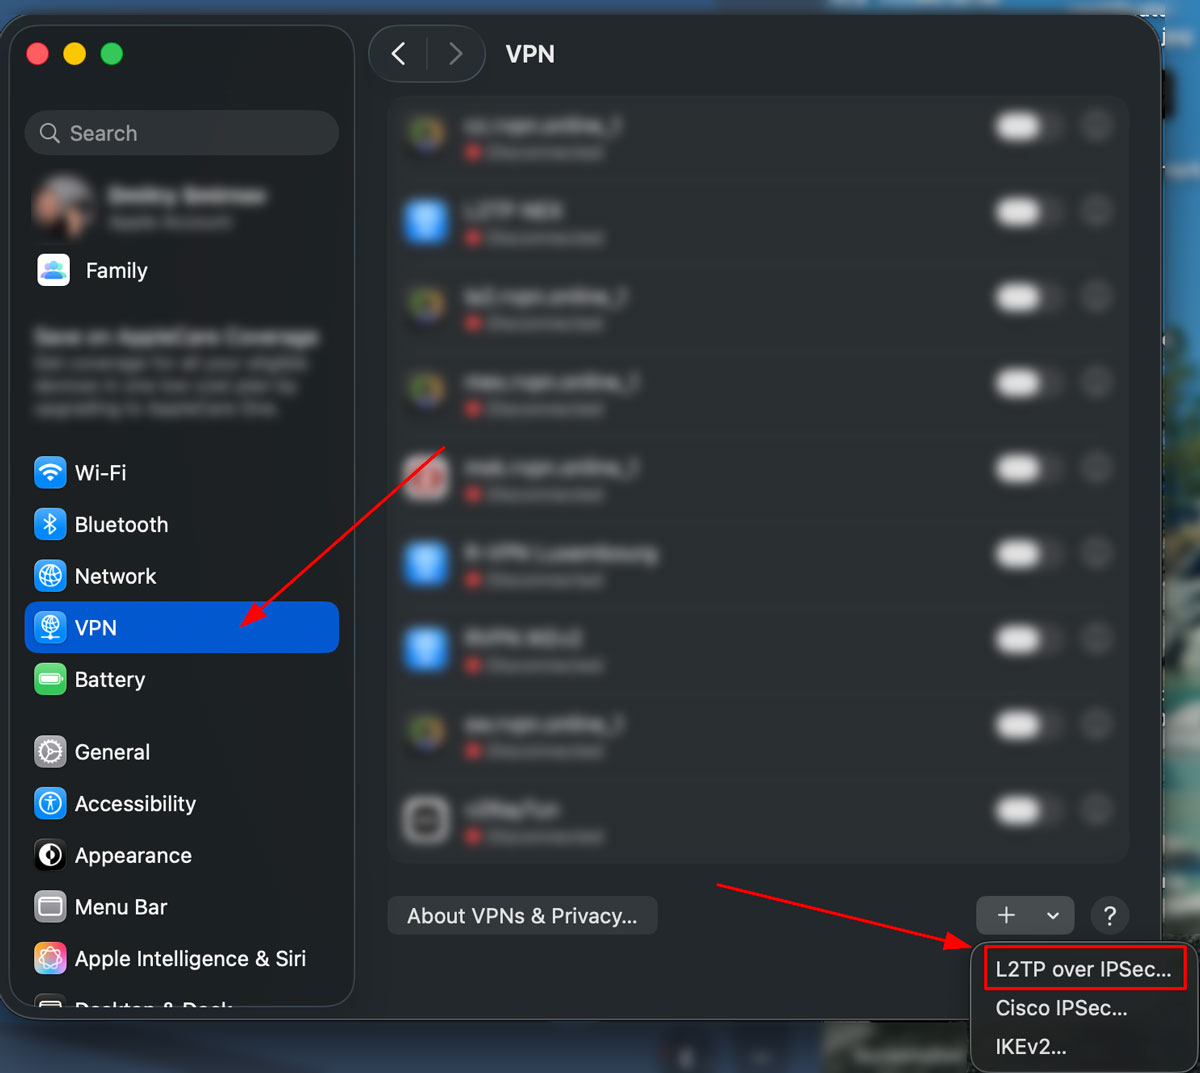
2. Adding a connection
Press + in the left column. Set Interface to VPN and VPN Type to L2TP over IPSec. Pick any name; including the country (e.g. "R-VPN Luxembourg") makes switching between locations easier later.
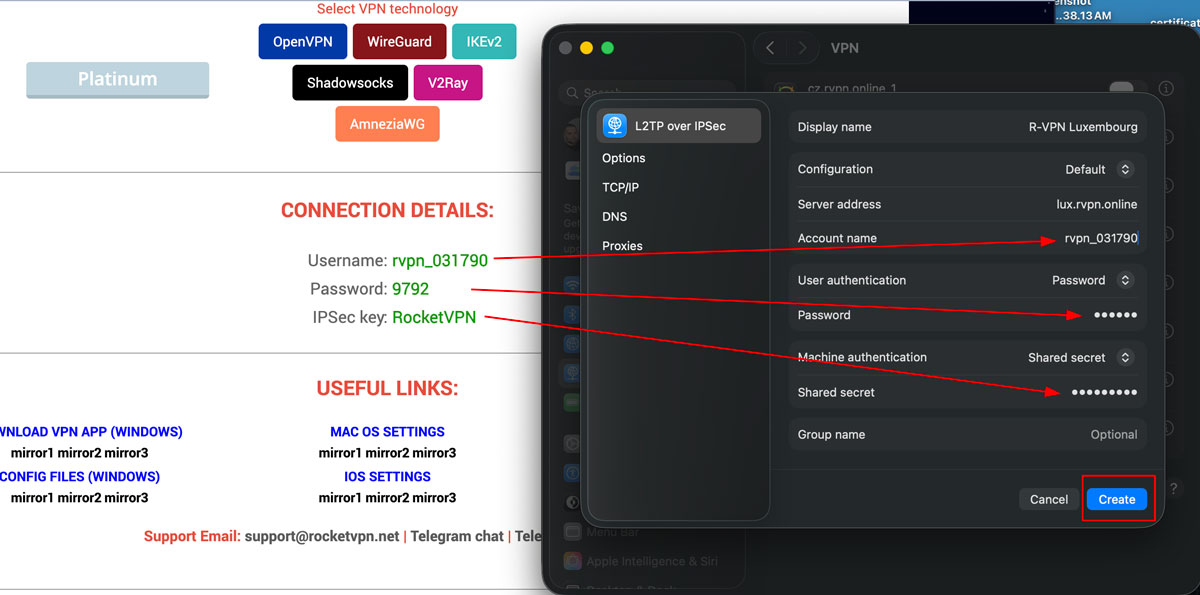
3. Connection details
Copy four values from your RocketVPN dashboard and paste them into the macOS form:
- Server address — the "Server Address" field
- Account name — the "Account Name" field
- Password — under "Authentication Settings" → "Password"
- IPSec key — same dialog, the "Shared Secret" field
Click each value in the dashboard to copy it cleanly — that avoids stray spaces at the start or end which silently break the connection.
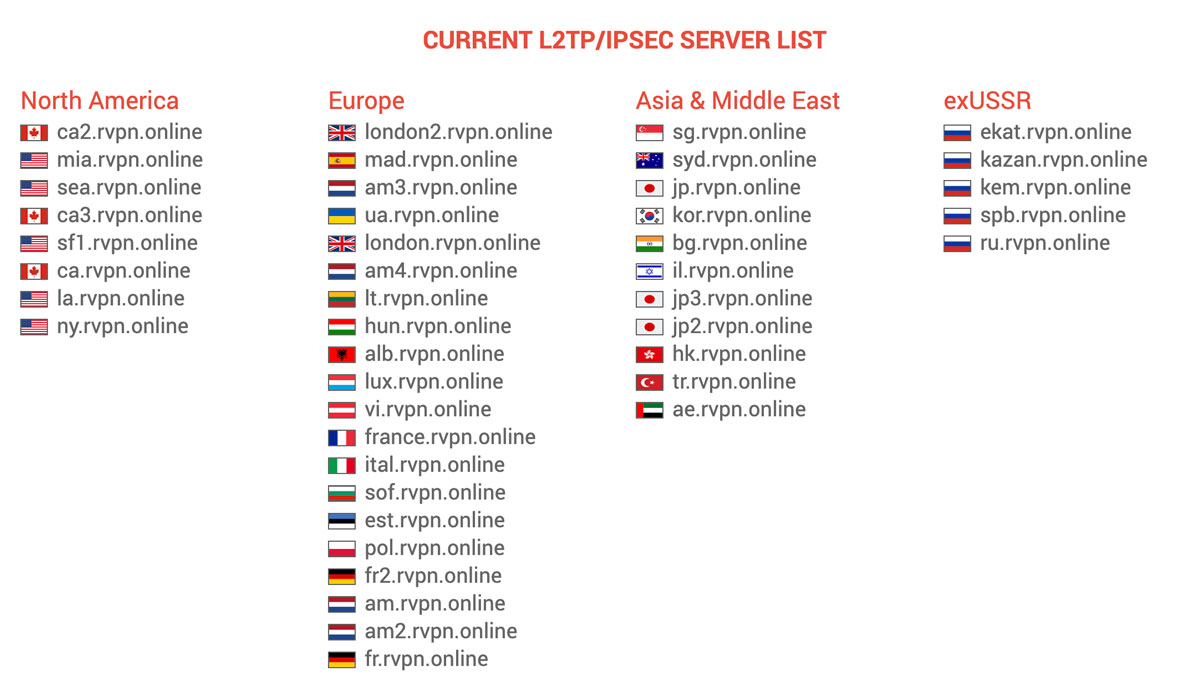
4. Backup connections
Add 5+ connections with different server addresses from your dashboard. If a regional provider temporarily blocks one subnet, you switch to a backup instantly — no reconfiguration needed.
The server list in the dashboard is live: blocks aren't permanent, so refresh the backups periodically.