

Android Setup — Happ (V2Ray)
Set up V2Ray on Android via the Happ app — the fastest way to bypass DPI restrictions.



1. Download
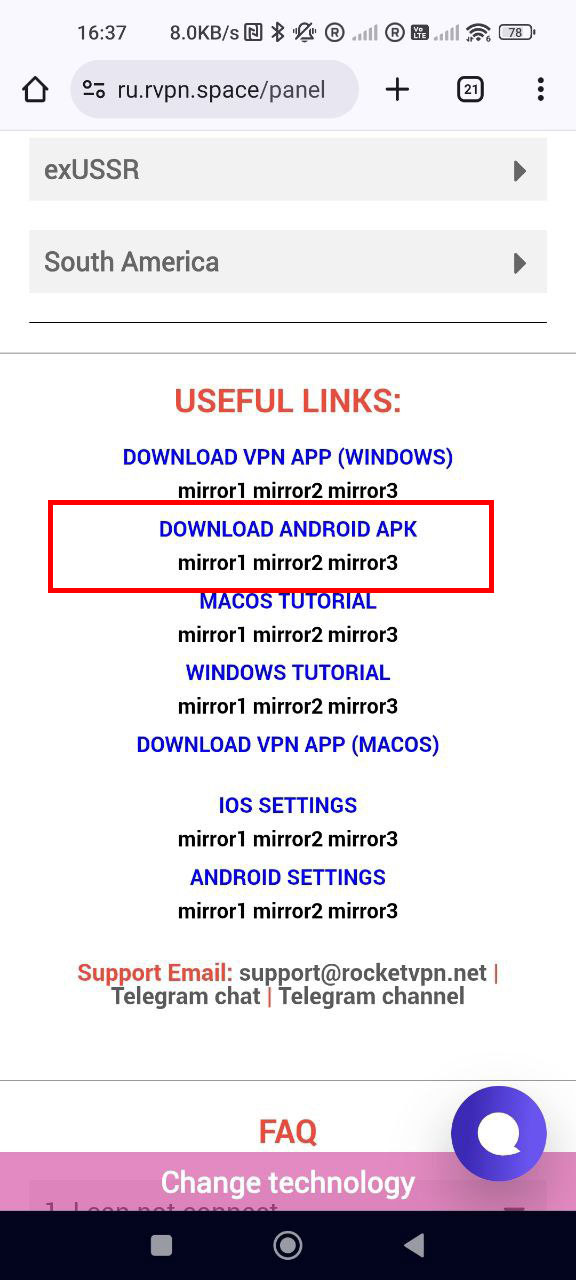
Install the Happ app from Google Play — Android 5.0 or newer is required. If Play is unavailable, side-load the APK instead: the "DOWNLOAD ANDROID APK" link is in your RocketVPN dashboard, and Android will ask you to allow installation from this source. Open the app once installed.
2. Server activation
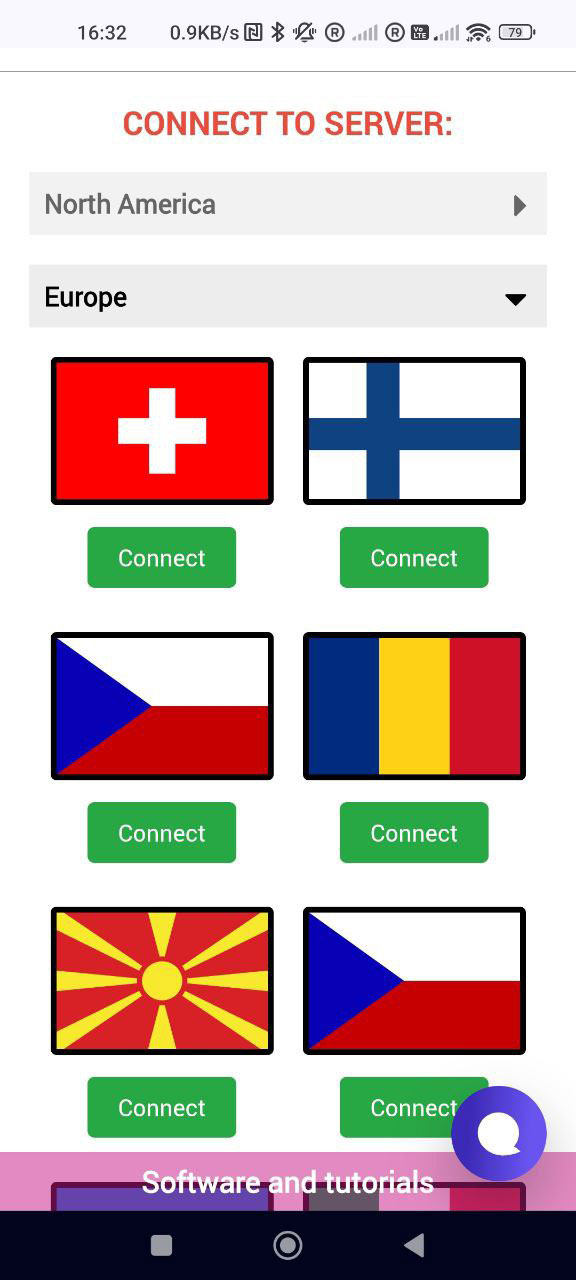
Open your RocketVPN dashboard and activate the servers you want by clicking the country flags. Pick locations geographically close to you for the lowest ping. Activate several locations as backups.
3. Copying the config
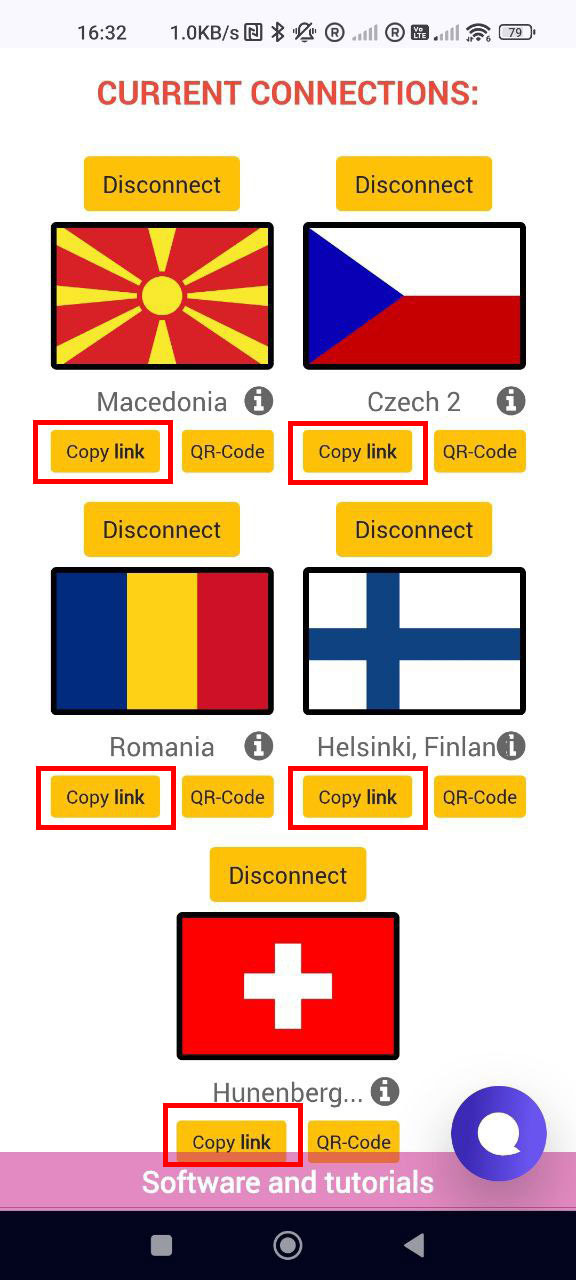
For each activated server the dashboard shows a V2Ray link in the form vless://.... Tap the link — it copies to your device's clipboard.
4. Configuration import
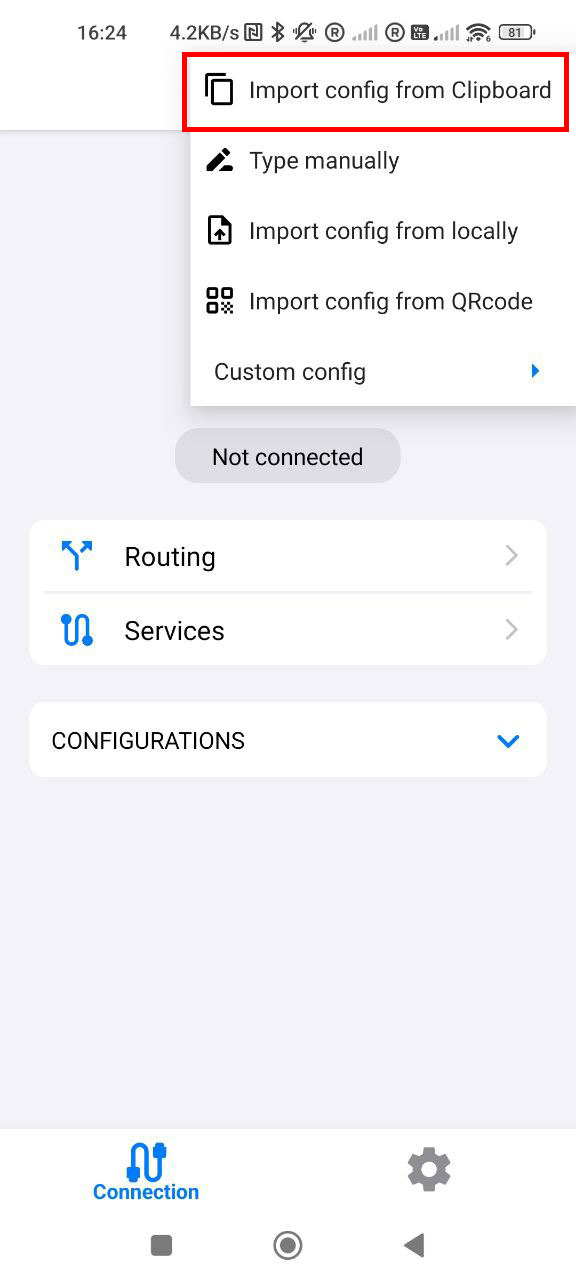
In Happ, tap + in the top-right corner and choose Import from Clipboard. The configuration appears in the list. If the link is shown as a QR code on another screen, the same menu has a “QR Code” item. Repeat for each server: with 4–5 profiles at hand the country changes with one tap.
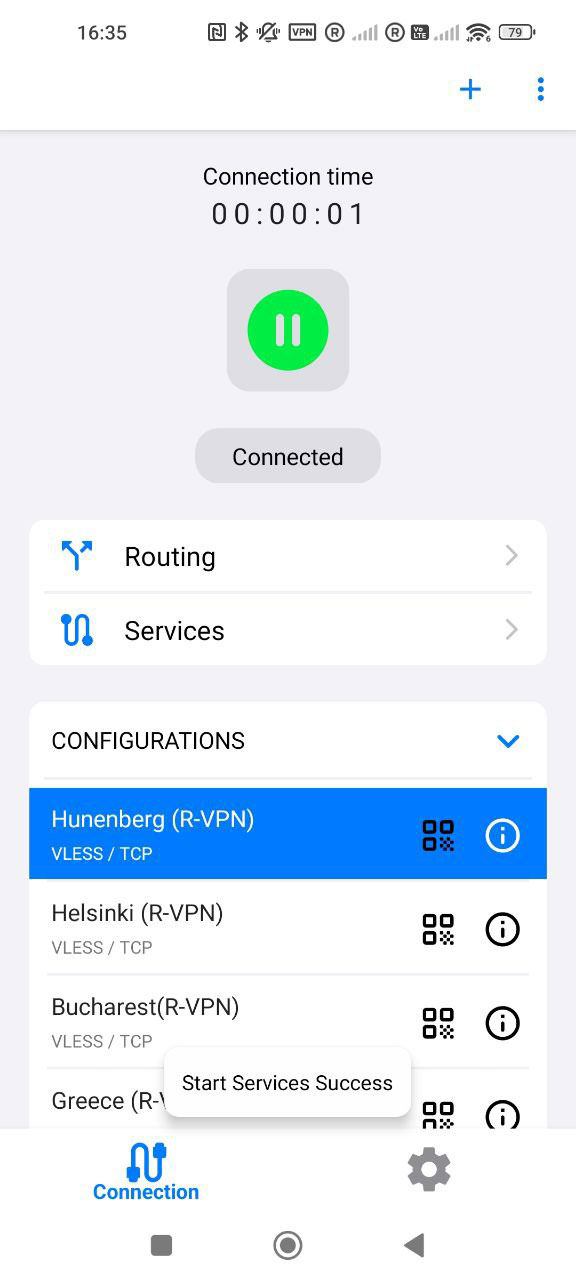
5. Connection
Tap the desired server in the list and press the big connect button. Android asks for VPN permission — approve it. Within 1-2 seconds the VPN indicator appears in the status bar — you're connected.
If a server doesn't respond, switch to another from the list. V2Ray over Reality masquerades as TLS traffic to popular sites, so it keeps working in regions where other protocols are blocked.
To avoid picking servers blindly, use our Radar service — radar.rvpn.online: it shows which servers are up right now and how fast they respond (sign in with your VPN login and password).
What next
Setting the VPN up on other devices — the guides for Windows, iPhone and Mac work the same way. The full list is in the instructions section.